Thrifted and re-purposed art supplies are SO FUN!Take a look at some of the one-of-a-kind masks and stencils I've created from thrifted, re-purposed, and found materials. I use most of these when I'm making collage papers and pulling prints on my gel plates. If you are unfamiliar with gel plate printing, this is a great overview. If you want to see some of my gel plate printed collage papers, you can find posts on Instagram:
 I do my best to avoid participating in capitalism in ways that line the pockets of businesses and bazillionaires with questionable practices (like actively harming lgbtqia+ folks, exploitative labor practices, ruining the planet, etc) so I avoid Hobby Lobby, Michael's, Amazon, etc as much as possible. We have a Goodwill Outlet about 7 minutes from our house here in Everett, and I love digging in the bins. If you aren't familiar with the Goodwill Outlet, it's different than typical Goodwill stores. The outlet is the place where everything that doesn't get sold on the floor at the local Goodwills (in our case, most of them in Snohomish County and some North Seattle too) gets sent for one last chance for a treasure hunter to snatch it up. Everything is dumped (and I mean this literally) into big, table sized, waist-high bins that shoppers can dig through. All items are sold by weight. So it's a great deal and a fun way to treasure hunt, but it is truly barely a step above dumpster diving! We love "digging in the bins" and I find some of the best stuff there. I also hit up other local thrift shops (like the Assistance League), estate sales, and watch my local Buy Nothing group for cool stuff. I took pics recently of a while bunch of my mask & stencil goodies so I could share with you a bit of this collection of unique-to-me artful tools. Finding cool tools thrifted is almost a hobby all by itself. One of the things I love best about it is that the things I use to create texture and pattern in my art making are often completely one-of-a-kind. It's fun to have stuff that I know no one else will be using! When I can't find things second hand, I usually try to look for independent and small sellers, like Joggles and Stencil Girl Cardstock
I love using cardstock because eventually then the pieces can become embellishments once they are painty and colorful. Use your cardstock stencils and masks for a while and let them build up a random patina of paints and patterns. When you start to feel bored with them, or they get a bit worn, they can be layered onto art journaling pages with glue or cut into different shapes as embellishment. Cardstock is pretty easy to find, you may already have some around the house somewhere. The covers of things like coloring and activity books are a great source. The cardstock in the pics above are old address book pages. On some I used punches to get circle shapes, others are hand cut, freehand, because I like the rough, organic look of that. The strips create fun stripes or plaid depending on how you want to use them. Wall Stencils
These were from a huge set of wall stencils that I found in the bins. It was originally an ocean scene with several stencils intended for layering, featuring coral, fish, kelp, and other underwater things. I didn't want anything recognizable, so I cut them into smaller pieces, purposely cutting across the middle of fish and other objects to break them up, but keep the interesting organic shapes. Once I'd done that, there was quit a bit of edge pieces of the stencil material, so I used that to cut free form shapes that felt interesting. Scrapbooking Elements & Stickers
These were packets of things I found that were intended for use in scrapbooking or other kinds of crafting or card making. The feathers were metallic cardstock and had dimensional sticky foam on the backs that I removed so they would lay flat. The scrapbooking elements are die cut cardstock. When I used the various words, I layer them over each other in lots of ways, so often you can't really read the individual words. I like the look of the fonts and letters in my art, and I'm often using only a small portion of the paper that gets printed. These are more elements that will build up fun colors as paint accumulates and then can later be used as embellishment in your work. Overhead Projector Sheets
Are you old enough to remember when teachers used overhead projectors in the classroom? I was lucky enough to find an entire box of blank overhead projector sheets at an estate sale and I knew I'd be making some masks and stencils with them! The stone shapes were drawn freehand and I love using them to create cairn type arrangements. The designs in the other pics were all drawn by me, using a sharpie or acrylic paint marker. For the knot-type shapes and simple funky rings, I drew the shape and used a wide chisel tip to go over it to get it as wide as I wanted them to be and then cut using scissors + X-acto blade. The sigils were created based on words and phrases that I wanted to incorporate into my art, so each one has a special and unique meaning. This link gives some basic info about sigils and is close to the method I used to create mine. The knot shapes are something I doodle frequently. I love having things like this that are highly personal and show up in different ways throughout my art making, giving even deeper layers of meaning and personalization! Leaves
I used gingko leaves I collected and photocopied them so that I could reduce and enlarge the sizes. This way, I could get the true gingko leaf shape, rather than relying on my memory. I liked being able to make some bigger and smaller, and then once I ran the copies, I used carbon paper to trace around the leaf shapes. You'll notice I left the top of the paper that was pulled out of a bound notebook, because it adds more shape and texture when using as a stencil. I also saved both the positive and negatives (so the masks and stencils) to use. I don't worry about cutting through and leaving a line in some of my stencil shapes - the X-acto can start to hurt my hand and the stencil not being perfect doesn't bother me. In order to get true, nice monstera leaf shapes, I laid plain paper under the leaves of my plant (still attached!) and traced around them with a marker. If you don't have access to fun, tropical leaves, take some paper and a marker to Home Depot or a nursery near you and trace some of their plants! Then I used the copier to enlarge/reduce the monstera leaves to get a variety of sizes. Think Outside the Box!
The foam sheets were hand cut into these funky shapes that match a shape I doodle frequently. They are sticky-backed, so once I'm done using them on my gel plate, they'll be an easy embellishment for an art journal. With the foam, you can also use a ball point pen or a poky tool to etch texture onto the surface, which will show in your print making. The teacher tools are something that featured the entire alphabet. I knew that the lamination would make them resist the paint and be a nice stencil/mask surface. I hand cut these simple flower shapes with scissors and use both the positive/negative images. You can't really tell in the photo, but the circles are just cut into from the sides, no X-acto knife (hurty hands, remember?) I found a bottle of dimensional glue and was actually trying to do something completely different with it (that didn't work) when I discovered that it dried really nicely on cardboard and I loved the seed pod shapes that I accidentally made. The window clings are another surface type that resists paint nicely and you can often find lots of different shapes, or you could cut pre-made shapes into something more unique to you. Misc. Fun Finds
The craft kit pieces are made of crepe paper so they have a very interesting texture. This is something else I love about digging in the Goodwill Outlet bins - want the leaf pieces in the craft kit, but not the rest of it? Take out what you want and throw the rest back in the bin! The nice thing about these leaves is that the wire allows them to be bent into shapes and makes them very easy to lift up off the gel plate when I'm done pulling a print. The mystery plastic thinga-ma-bob actually came in a package about about 50 and I grabbed around 10. I have no idea what it was supposed to be for, but the X shapes pop out and can be used as masks and the remaining square then makes a great stencil. Hot Glue These hot glue shapes are super fun and easy to make. I use silicone baking mats (also pulled out of the bins) and my hot glue gun and create all kinds of fun shapes. I have lots like these flowers, but also big, sheet-sized stencils in random patterns. Once the glue cools, you can peel it off the mat and use it on the gel plate. If you don't have a silicone mat dedicated to art'ing, I've heard that freezer paper also works pretty well. Let's talk about PAPER! If I could make one request to everyone I know who is out there making art and getting creative: PLEASE DON'T purchase paper new. We need the trees (and water and other resources) more and there is SO MUCH PAPER out there in our world already. I use lots of paper that is headed to the landfill or recycle bins. Sources I find/use: coloring book pages, old textbooks, graph and notebook paper, old homework pages, sheet music, cookbook pages, packing paper, office papers, posters, junk mail, outdated manuals for appliances, old employee handbooks....seriously this list could go on for a VERY long time! Old books with outdated material are a great place to find cool diagrams, random drawings, or just text that often gets covered over. Dig through your kitchen junk drawer, save the packing and wrapping paper that makes its way into your house. I love finding old notebooks with handwriting or notes from years and decades before. When I go into Seattle, I look for the phone posts with thick layers of posters and find the outdated ones and pull off big stacks of colorful printed and lettered paper. I like the layered look of text and writing and little imagery peeking through. And many times, if you are pulling gel plate prints, all of it gets covered up anyway! Take a minute to think about what you already have at home. Slow down and do some thrifting! Direct your $$ toward small & local businesses when possible. Then you get cool finds that will create patterns and shapes in your art that no one else will have! If you are inspired by any of these ideas, let me know! Share your fun thrifted finds with me! I'd love to hear what you are using to make art and be creative!!
0 Comments
Your First Draft is Supposed to Be Crap. |


| P.S. (do we do a P.S. on blog posts??? oh well, it's happening) Back in 2022, I talked with my good friend Meg about perfectionism, and why it is so important to have spaces where we can practice NOT being perfect. You can listen to that podcast episode here. |
Come make mini-journals with me this month!
Open to everyone. Simple materials you probably have around the house.
Connection, creativity, FUN, and surely a few shitty first drafts!
(no perfectionism allowed)
Thurs, Aug 28 ALL THE INFO IS HERE
Connection, creativity, FUN, and surely a few shitty first drafts!
(no perfectionism allowed)
Thurs, Aug 28 ALL THE INFO IS HERE
It can feel challenging to keep moving into the beautiful mess and away from the perfectionism that keeps us frozen in non-action. Need a wee, gentle nudge?
Comment here, dm me on social media, or send an email,
and I'll send you my Recovering Perfectionist pdf -
with journaling prompts, ideas for letting go of perfectionism, and more.
Comment here, dm me on social media, or send an email,
and I'll send you my Recovering Perfectionist pdf -
with journaling prompts, ideas for letting go of perfectionism, and more.
Art journaling can be fun, simple, and easy to get started!
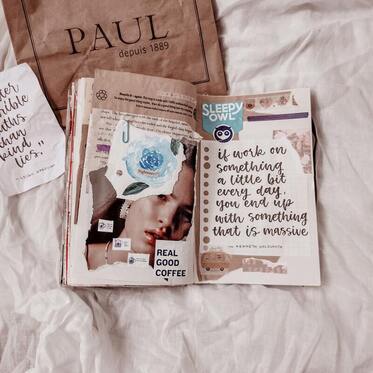
Art journaling doesn't have to be expensive or overwhelming!
Art journaling can be a fun way to get creative and to explore your thoughts, dreams, and growth journey. It can be a way to record your day-to-day activities, or a place to dive into words and images in a new and fun way! Simply put, art journaling is very like keeping a written journal, it's just done visually with color, images, art, collage, and more!
I think art journaling can be accessible and super easy to get started. Like anything, capitalism has figured out how to package everything up and sell it back to us, and to convince us that we need to spend a lot or have a big pile of supplies just to enjoy something. I'm going to share some ideas about art journal supplies that can get you started with what you've already got at home!
Maybe you have a little bit of a budget to purchase some supplies, and that's great! But if you want to explore art journaling without breaking the bank, here are some basics for you. Look through your kids' crafty supplies, dig in your junk drawer, pull out that old scrapbooking stuff....give the artful things you already have new life in your art journal!
First things first: you'll need some kind of journal.
This can be ANY kind of book, journal, spiral bound art paper, notebook, etc. that can be used for your artful explorations! It's ok if it has lines. It's ok if you already took notes from your wolverine training class in parts of it (this can actually become part of an art journal "spread" later!) If the pages are thin, you can glue multiple pages together in order to create a thicker page to hold wet media like watercolors or collage. There are ways to make ANYTHING work!
 If you have the ability to purchase one, this is my very favorite journal to work in. I have multiples of these in various sizes. The paper is thick and the spiral binding means that even if the pages get built up with layers, it still lays relatively flat. My go-to for ordering these is Blick Art Materials. |  Got something like this laying around? (or maybe 37 of them, all with only 2 pages written on? just me???) Any basic journal will work, with or without lines. I often find these types of journals for a buck or two while thrifting. | 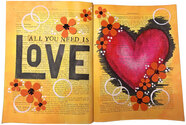 Create an "altered book"! Use an old, outdated book and paint, collage and art right on top of the existing pages and text! This image is from Mixed Media Club and you can read more about altered books here. |  A plain, old fashioned composition book will work too! These are often cheap (especially around back-to-school time), and readily available. Yes, there are lines, but you are going to be gluing, painting, and art'ing right on top of them!! |
The fun stuff: art-y supplies!!
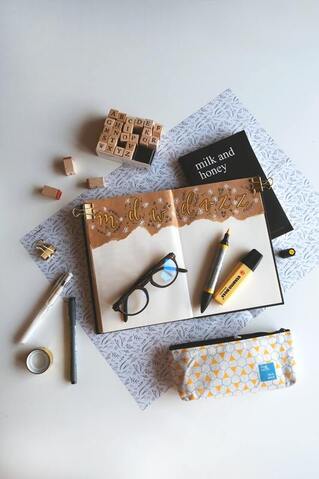
Firstly - this category can feel overwhelming because there is SO MUCH fun stuff we could work with!! Remember that you DO NOT NEED ALL these things! But you may have more than you think just by poking around your house.
Many people who participate in my Seeds of Connection groups do so with just a very basic notebook or paper + colored pencils or markers. It's ok to keep it simple, and dive right into the fun of art journaling!
The very basics:
* scissors
* glue, tape or glue stick
* pens that you like to write with (gel pens, black Sharpie, your favorite Bic, any of these will work, just something that writes smoothly and makes you happy!)
* colorful art medium of some kind: markers, crayons, colored pencils, pastels, paint, watercolors, or anything else that you enjoy working with
Other supplies that can be fun (and are completely optional):
* stamps & ink
* stickers
* ribbon or string
* Mod Podge or matte medium
* washi tape
* decorative papers (like for scrapbooking or origami)
* stencils
Household supplies/items that can also be fun (and optional!):
* bubble wrap
* old magazines
* collage-able things like: junk mail, old photos, greeting cards, images printed from online or cut out of old books
* items for making marks/prints: comb, old toothbrush, mesh wrap from fruit/veggies, cardboard tube, eraser on a new pencil, plastic wrap, corks
Optional, but FUN! Oracle or Tarot cards
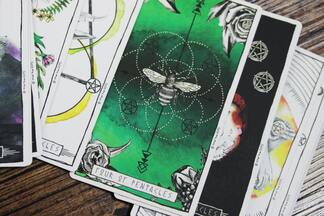
In my personal work with an art journal, I've found that using tarot or oracle cards can be a really fun way to take deep dives into a variety of topics. In my Seeds of Connection groups, we pull a card from one of my many decks each week and we discuss the theme of that card and then create art based on that card/theme. It's a really fun process that can lead to interesting and surprising discoveries!
The very short version of this method is to begin by grounding yourself with a bit of breathing or mindfulness. Shuffle your deck and invite curiosity and discovery to join you in your art journaling process. Pull a card at random and lay it in front of you. Take a good, long look. What do you notice about the artwork? What are the initial thoughts or feelings that come for you when you see this card? What does the theme or subject of the card mean to you? Take a few minutes to journal some of your thoughts if you want to, and then move into art'ing using this theme as your guide.
It's not about re-creating the art from the card (although that may happen), but about exploring the theme and "following the breadcrumbs" of what wants to be created from your thoughts, feelings, and associations with this card.
All about art journaling - some resources
Learn more and get ideas for what art journaling can be! Take a look through some of these links. But remember: we are start somewhere! Don't get overwhelmed. Art journaling really just starts with drawing, painting, writing, or gluing something into your journal, it doesn't have to be fancy. Your skills, satisfaction, and creativity will GROW with every page you create and every mark you make!
Some of my favorite resources for art journaling supplies & ideas
Remember! You don't NEED to purchase lots of stuff, and don't get too bogged down in endless scrolling rather than actual art journaling. But here are some links to folks I have purchased from or who I follow and regularly learn from.
- Stencil Girl - for RAD artist-designed stencils
- The Bricolage Factory - for awesome ephemera packs and lots of other fun arty things! Follow her on IG for shop updates (her goodies sell out FAST!): @ricki_ticki_tavy
- A Work of Heart Studio - for fun supplies and stencils. Follow her on IG for lots of fun art journaling (and other artful) ideas: @aworkofheartstudio
- Orange Spiral Arts on IG
- Shemi Dixon on IG
- For lovely ways of stepping into creativity and mindfulness: embody.create.heal on IG
- My very favorite not-big-box retailer for art supplies is Blick Art Materials. If you're in/near Seattle, visit their store in the Captiol Hill neighborhood!
- If you're in/near Seattle, be sure to check out Seattle ReCreative - a non-profit, 2nd hand art supply store and community art center.
Got any great tips for art journaling on a budget?
What are your favorite supplies to work with?
Share in the comments!!
If you are a small biz seller of art journaling supplies, ephemera, or fun artful goodies, please get in touch with a link to your site (or post a comment here), I'd love to add you as a resource here! If you have a YouTube channel or art journaling based Instagram, please hook us up with those links as well.
Author
It's me, Crystal. I need a place to put all my extra words.
Archives
August 2026
June 2026
May 2026
April 2026
March 2026
February 2026
October 2025
August 2025
February 2025
December 2023
March 2023
February 2023
January 2023
October 2022
September 2022
August 2022
July 2022
June 2022
May 2022
March 2022
February 2022
January 2022
July 2020
Categories
All
100 Days With ABC
Art Journaling
Connect & Create
Dahlias
Group Resources
Poetry
Practicing Together Project
Seeds Of Connection
 RSS Feed